How to write a crochet amigurumi pattern
Share
So, you want to start writing your own amigurumi patterns but you’re not sure where to even start? Don’t worry, I’ve got you!
There’s a huge amount that goes into writing an amigurumi pattern and one of the most important things to remember is that it takes time and perseverance to get it right, so don't be discouraged if it doesn’t work out the first time you try!
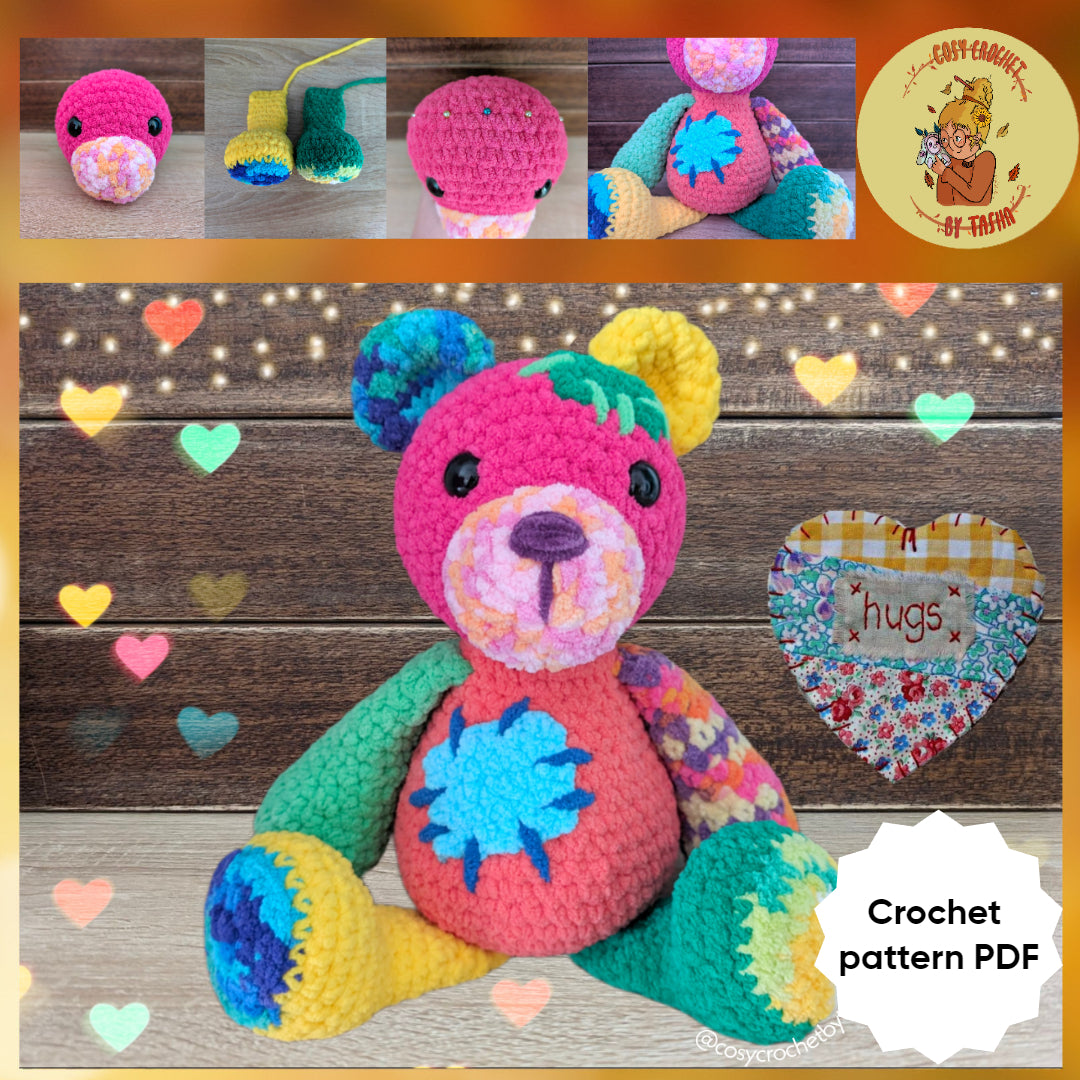
For this blog I’m going to use my Scrappy Bear pattern as the example of how I go about creating a pattern. If you haven’t seen my Scrappy Bears then you should definitely check out the pattern as it’s a great way of using up all those scraps of yarn you’re not quite sure what to do with! If you want to grab your own copy of the pattern it can be found here.

Step 1: The idea
Before you can begin to write a pattern, you need to have an idea! My ideas generally come to me in 3 different ways:
- From noticing a gap in the market
- From wanting to make something specific, but not being able to find a pattern I like (or which matches the idea in my head of what I’m looking for)
- From talking to friends/family
The idea for Scrappy Bear came about when I was looking at my yarn stash and wondering what to do with all the blanket yarn I had. Most of the yarn was from a company which no longer exists, meaning I can’t get hold of any more of those colours. I didn’t have enough of any one single colour to make a complete plushie so I decided to get creative and create a patchwork bear!
Once you’ve got your idea it’s a good idea to sketch it out, or if you’re no good at drawing, jot down the design idea, e.g. colours, size, details etc.
Finally, before starting work on creating the pattern, do some research to check that your idea hasn’t already been done and that there’s nothing too similar out there. Of course, there are some patterns which are absolutely done to death (I’m talking cows, turtles & bunnies in particular), but it’s important that you have a look on somewhere like Etsy to see what already exists so that you don’t get accused of plagiarising someone else’s work.
Step 2: Pattern layout and design choices
Have a look at some other paid patterns to get some ideas about layout, abbreviations and format options. I opened up around 5 patterns from different pattern designers I love and had a look at how each of them had decided to create their PDFs.
I’m a very visual learner, so I personally like patterns which show photos of each piece of the plushie, as well as photos of each stage of assembling the plushie so this was something I wanted to incorporate into my own patterns. I also decided I wanted my patterns to be simple and without a busy colourful background, making them more accessible and less visually overwhelming. These are just personal preferences, but it’s a good idea to get a general idea of what kind of style you’re aiming for.
Things to consider:
- Font - make sure it's clear and easy to read
- Colours - do you want them to match a logo? Are they visually accessible?
- Photos - throughout the pattern or just at the end?
- Page numbers - handy for people who want to print out the pattern
- Backgrounds and/or borders - do they make it more visually attractive or do they just make the page look overwhelming?
It’s also important to decide on the abbreviations you’ll be using for your pattern writing (e.g. 6inc or inc x6) – make a note of them somewhere so that you can ensure consistency throughout the pattern (and any future patterns you may write!)
Step 3: Start creating!
So there’s a couple of different ways you can go about this:
I personally write the pattern out fully (as best I can), and I then start crocheting each piece and will adjust and revise the pattern as I go. For Scrappy Bear I started by making the body as that was going to be the ‘base’ for everything to be sewn on to. This helped with getting the ratios right for the rest of the pieces.
The other way is to just start crocheting each piece and write the pattern out as you go.
Neither way is ‘correct’ so try out each way and see what works for you!
PLEASE KNOW THIS: even as an experienced amigurumi pattern writer, I still have to unravel pieces multiple times before I’m happy with them! Yes, it can be frustrating but it’s all part of the process!
Step 4: Take photos of all the pieces and then assemble everything
Once you’ve got all the pieces made, take photos of each piece. Make sure you take the photos somewhere well-lit and that the photos are clear and good quality. They don’t have to be anything fancy, they just need to illustrate what each piece should look like.
Once you’ve got all your photos, you can start assembling your plushie. Take photos of every step (from multiple angles) and when writing the instructions, be as specific as possible about how to sew everything together.
It’s incredibly frustrating for other crocheters (especially beginners), if the instruction just says ‘sew the arms on’.
Instead, tell them exactly where the arms should be placed ‘sew the arms either side of the body 2 rounds down from the neck. There should be about 8 stitches between the arms across the front of the body.’
Step 5: Make another one and test the pattern yourself!
Once you’ve finished the ‘prototype’ plushie it’s time to follow your own pattern and make another one! This step is really important as it’s a good opportunity to start checking for errors and typos and gives you the opportunity to check that you can make the second plushie look exactly the same as the first one. If you can’t then it’s a good indication that people following your pattern are going to struggle too!
Step 6: Finding testers & working with testers
Once you’re happy with the pattern and you’ve checked it through for errors, it’s time to work with some pattern testers to make sure that other people can understand it too! This step is especially important if you’re going to be charging people for your pattern. It’s not fair to sell a pattern which is full of mistakes or is hard to follow.
For pattern testing I generally post to Instagram to find testers. There are lots of different ways to do this part but I personally do the following:
- Make my post (which clearly shows the pattern I’m looking for testers for)
- Write out in the caption of the post what I want from people looking to apply
- Choose testers on the deadline specified
- Email them the pattern in PDF format
- Create an Instagram group chat for the testers to be able to share feedback, questions and photos
For an example post, have a look here.
When choosing testers, here are some things you might consider when choosing:
- Did they read and follow the tester call instructions?
- Do they take nice photos of their creations?
- Do they have the appropriate skill level?
- Followers – not just the number of followers, but are their followers engaged with their posts?
- Do they credit pattern designers in their posts?
Step 7: Adjust the pattern and make any necessary corrections
Once your testers have tested the pattern and given feedback you can then make any final adjustments and corrections needed. Remember, their feedback is essential and you should encourage the testers to be as honest as possible.
Step 8: Price, platform & marketing
Once the pattern is ready, you need to decide where you want to list it for sale. This is a personal choice and will depend on all kinds of different things. Some common choices are Etsy, Ravelry, Shopify and Ribblr. Do a bit of research into how each of these platforms work and the fees associated with selling on them. A lot of pattern designers start out on Etsy as it is easy to set up and is a good platform in terms of people finding your patterns.
Make sure that wherever you decide to sell your pattern the listing is detailed and includes information about the materials they'll need, some photos of the finished plushie, and the fact that they are purchasing a digital pattern and not a finished item!
Next you need to decide on how much to charge for the pattern. Again, this is a personal choice but I’d encourage you to do the following:
- Have a look on Etsy and look at some of the other patterns out there to see how much your competitors are charging
- Think about the time it took you to create the pattern
- Consider how complex the pattern is
Once the pattern is published and ready for sale, get marketing! Ask your testers to post photos of their finished pattern test to their social media, post lots of content about your pattern to your social media and keep showing it!
Consider running a sale on release day, or perhaps sharing a discount code with people who share the release information on their Instagram stories… whatever you do, keep on posting about it and don't be discouraged if it takes a little while for people to discover how awesome your new pattern is!
